Buying an HVLP spray gun can feel strangely personal. Painters argue about them the way mechanics argue about tool brands. One person says SATA is the only serious choice. Another trusts IWATA because it lays clear with a softer feel. A garage painter may say a $150 kit worked fine on a project car. A shop painter may look at that same kit and say it would slow the whole paint room down.
A beginner should not buy the same gun as a production body shop.
A DIY painter needs an easy-to-control setup: one primer gun and one finish gun, matched to the compressor. A working auto body shop needs repeatability, service parts, coating-specific setups, and a gun that helps reduce rework. If you are painting at home, start with a practical two-gun setup. If you run a shop, build a small spray-gun lineup around primer, basecoat, and clear coat.
The right HVLP spray gun gives you a clean fan, steady atomization, manageable air demand, and confidence when the paint hits the panel.
Start With the Painter, Not the Spray Gun
A spray gun is not good or bad in isolation. It becomes the right tool only when it matches the painter, the coating, the air supply, and the job.
That is the part many buyers miss. They look for one winner. Car painting does not work that neatly.
A person painting a bumper in a home garage has different needs than a painter spraying three repair orders before lunch. A project-car owner may need a gun that works with a moderate compressor and does not cost more than the whole paint budget. A body shop needs a gun that behaves the same way day after day, even with different colors, clears, temperatures, and painters.
The job also changes the gun choice.
Primer is thick and forgiving because it gets sanded. Basecoat needs an even pattern so metallics and pearls do not streak or mottle. Clear coat exposes every weakness in the setup. Poor atomization, unstable pressure, and dirty fluid passages can show up as orange peel, dry spray, sags, or tiny bits of trash in the finish.
That is why the smartest answer is not “buy this one gun.” The smarter answer is to build the right setup around the coating stage.
A beginner should not try to spray primer, sealer, basecoat, and clear through one cheap gun with one fixed tip. A shop should not ask one expensive gun to carry the entire paint room either. Both painters need separation. The only difference is the level of equipment.
How to Choose the Right HVLP Gun for Car Painting
A weekend painter, a serious home painter, and a working shop all need different buying advice. This section gives the cleanest route before we talk about individual guns.
A Beginner Should Buy Two Guns, Not One Expensive Gun
The smartest beginner setup is simple: buy a larger-tip primer gun and a cleaner finish gun.
The primer gun can be cheaper. It only needs to move thicker material evenly. Primer gets sanded, so the finish does not need to look glossy. A 1.7 mm or 1.8 mm tip works well with many primer surfacers, while heavy high-build products may ask for 2.0 mm or larger.
The finish gun needs more care. This is the gun used for basecoat and clear coat. A 1.3 mm or 1.4 mm tip is a common starting point. It should create a balanced fan, atomize cleanly, and feel predictable in the hand.
This two-gun setup protects the final finish. Primer dust, dried build primer, or rough cleaning habits can damage a gun over time. Keeping primer away from the finish gun lowers the risk of contamination.
A beginner does not need a $1,000 gun right away. A beginner needs a clean pattern, enough air, proper tip sizes, and practice panels.
A Serious DIY Painter Should Step Above Entry-Level Kits
A person who plans to paint more than one car should buy better equipment earlier. Not because expensive tools magically spray better, but because a better gun gives the painter fewer random problems to chase.
The serious DIY painter may repaint a classic car, spray motorcycle parts, fix panels for friends, or learn refinishing over several years. That painter can outgrow a cheap kit quickly.
A good move here is to keep a budget primer gun, then spend more on the finish gun. The finish gun affects basecoat layout, clear coat texture, and buffing time. A smoother clear coat can save many hours after the paint cures.
This is where guns like the ANEST IWATA LPH400 and 3M Performance Spray Gun 2 start to make sense. They cost more than starter guns, but they give more control, cleaner changeovers, and stronger long-term value.
A Professional Auto Body Shop Should Buy Around Repeatability
A body shop should not buy spray guns the same way a hobbyist does. Shops need repeatable results. They also need parts, support, and speed.
A shop-level gun should behave the same way each morning. The fan should stay stable. The trigger should feel smooth. The air cap and fluid setup should match the coating. Cleaning should be fast and predictable. Replacement needles, nozzles, seals, and caps should be easy to source.
A shop also needs more than one gun. A practical paint room usually has a primer gun, basecoat gun, clear coat gun, and often a mini gun for jambs, mirror caps, bumpers, and small repairs.
That sounds expensive, but shop math is different. A redo costs labor, booth time, material, schedule pressure, and customer trust. A premium gun can earn its place if it lowers texture, mottling, contamination, or rework.
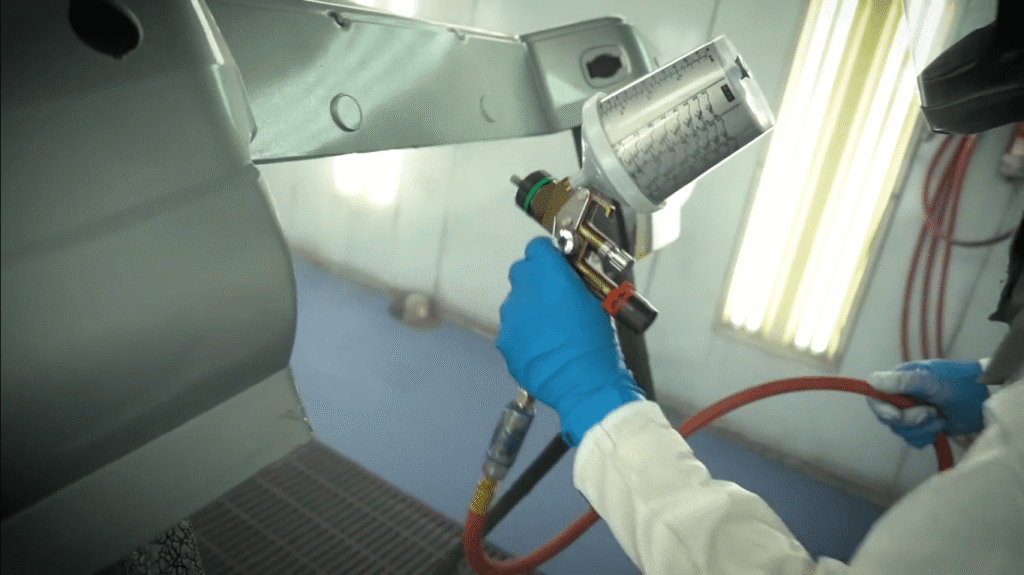
What HVLP Actually Means in Automotive Painting
HVLP stands for high volume, low pressure. The gun uses a high volume of air at lower pressure at the air cap. The idea is to move more paint onto the panel and send less into the air as overspray.
This does not mean the regulator at the handle always reads 10 psi. Many HVLP guns are set higher at the inlet because pressure drops inside the gun before air reaches the cap. The correct setting comes from the gun manual and the paint technical sheet.
HVLP became common in automotive refinishing because it can help with material control and overspray reduction. That matters in garages and shops alike. Paint that lands on the panel is useful. Paint floating around the room is wasted material and extra mess.
A good HVLP gun can still spray badly if the air supply is weak or the painter rushes the setup. The letters on the gun do not save the job. The pattern on the test panel tells the truth.
The Compressor Can Make or Break the Paint Job
Many painters blame the spray gun when the real problem is air.
HVLP guns can need a lot of air. A small compressor may show a decent pressure reading before the trigger is pulled, then fall off once spraying begins. The fan weakens. The atomization changes. The panel gets dry spots or uneven texture.
Tank size can be misleading. A large tank gives a short buffer, but the pump still has to keep up. Delivered CFM matters more than tank size alone.
A bumper, mirror cap, or small repair can be sprayed with less air because the painter can stop and let the compressor recover. A full car repaint gives less forgiveness. The roof, hood, doors, and quarter panels need steady pressure across longer passes.
Air quality is just as serious as air volume. Moisture can ruin paint. Oil can cause fisheyes. Dirt can land in the clear. A gun regulator, water separator, proper filtration, clean hose, and clean fittings belong in the same budget as the spray gun.
A $900 gun connected to wet, dirty air is still a bad setup.
Nozzle Size Has to Match the Coating
Nozzle size controls how much material passes through the gun. Thick coatings need more opening. Thin coatings need more control.
Most automotive basecoats spray well through 1.3 mm or 1.4 mm setups. Many clears use 1.2 mm, 1.3 mm, or 1.4 mm depending on the gun and product. Primer surfacer often needs 1.7 mm or 1.8 mm. High-build primer may need 2.0 mm or larger.
These numbers are starting points. The paint technical sheet should guide the final setup.
| Coating stage | Common tip range | What the gun needs to do |
| Sealer | 1.3 mm to 1.5 mm | Lay a smooth, even foundation |
| Basecoat | 1.3 mm to 1.4 mm | Keep color even and controlled |
| Clear coat | 1.2 mm to 1.4 mm | Atomize finely and stay wet without sagging |
| Single-stage paint | 1.3 mm to 1.5 mm | Build color and gloss evenly |
| Primer surfacer | 1.7 mm to 1.8 mm | Move thicker material without clogging |
| High-build primer | 1.8 mm to 2.2 mm | Handle heavy solids and build |
A painter should always test the gun before the car. Spray masking paper first. The pattern should look even from top to bottom. No heavy crescent at one end. No split center. No dry edge.
Then spray a test panel. Cardboard can show pattern shape, but it does not show how clear flows or how metallic basecoat sits. A spare fender, test panel, or scrap hood gives a much better read.
Primer, Basecoat, and Clear Do Not Want the Same Gun Behavior
A car’s finish is built in layers, and each layer asks the gun to behave differently. Treating every coating the same is one of the fastest ways to create problems.
Primer Needs Flow, Not Beauty
Primer is about build and sanding. It needs to cover scratches, fill minor surface texture, and give the painter enough material to block the panel straight.
A primer gun should have a larger tip and a steady flow. It does not need to create a wet-gloss look. In fact, chasing beauty with primer can lead to too much material too quickly.
A budget gun can work well here. Many DIY painters save money on the primer gun and spend more on the finish gun. That is a sensible trade.
Basecoat Needs Balance
Basecoat is where color control matters. Solid colors are more forgiving. Metallics and pearls can be picky. A weak pattern can create stripes, patchiness, or mottling.
A basecoat gun should lay color evenly without flooding the panel. The fan should have clean edges and a stable center. The painter should not need to fight the gun to keep each pass consistent.
Basecoat is not supposed to look like clear coat. Beginners sometimes try to spray it too wet because they want shine. That can cause solvent issues, uneven metallics, or runs. The clear brings the gloss later.
Clear Coat Shows the Quality of the Setup
Clear coat is the stage where the finish becomes personal. This is where painters lean in and watch the wet edge under the light.
A clear gun needs clean atomization and smooth material delivery. Too dry, and the surface gets texture. Too wet, and the clear runs. Poor atomization can leave orange peel that needs sanding and buffing later.
A higher-quality finish gun can save time here, especially in a shop. Less texture can mean less correction work. In a garage, it can mean fewer heartbreaking moments after days of prep.
Best HVLP Spray Guns for DIY Car Painters
A DIY painter needs a spray gun that feels forgiving before it feels fancy. Most home painters deal with limited air supply, tighter budgets, and less booth control. The goal is not to buy the most expensive gun on the shelf. The goal is to buy a gun that sprays evenly, matches the compressor, and does not punish every small mistake.
The cleanest home setup is usually two guns: one cheaper primer gun with a larger tip, and one cleaner finish gun for basecoat and clear. That setup gives a better result than forcing one gun to spray every coating.
Eastwood Concours LT100: A Friendly Pick When Air Supply Is Limited
The Eastwood Concours LT100 is easy to recommend to garage painters because it was built around lower air demand. That matters more than many beginners realize. A nice fan pattern will not stay nice if the compressor struggles halfway across a hood.
The LT100 is commonly sold with a 1.3 mm setup, which fits basecoat and many clear coats. Current pricing often sits around $90 to $105, depending on sale pricing and seller.
This gun makes sense when someone is spraying bumpers, fenders, small repairs, or a project car at home. It is not a high-end production gun, but it gives a beginner a more realistic chance when the compressor is not huge.
The downside is simple. A low-air DIY gun still needs clean air, correct reducer, and practice. It can help with air demand, but it cannot fix water in the line, bad masking, or rushed clear coat.
DeVilbiss StartingLine Kit: A Practical First Kit With Useful Flexibility
The DeVilbiss StartingLine kits are popular because they give beginners a simple way to separate coating stages. Some kits include a larger gun and a smaller touch-up gun. Other kits include several tips that help with primer, basecoat, clear, and smaller repairs.
That flexibility helps a new painter. A 1.3 mm or 1.4 mm setup can handle many lighter automotive coatings. A larger tip works better with primer. Current pricing often falls around $150 to $250, depending on the kit.
This is a sensible choice when someone is painting a project car, motorcycle parts, or learning panel repair. It gives enough range without pushing the buyer into premium-gun money too early.
The weak point is finish refinement. A StartingLine gun can do good work in patient hands, but it will not feel like a shop-grade SATA, IWATA, or DV1 when clear is going onto a large black panel. That is not a failure. It is a starter kit, and it should be judged that way.
TCP Global 3-Gun Kit: Low-Cost Practice Value With a Useful Tip Spread
The TCP Global 3-gun HVLP kit is attractive because it usually gives the buyer multiple gun sizes in one package. A common kit includes 1.0 mm, 1.4 mm, and 1.8 mm setups. That gives a DIY painter a small-parts gun, a finish gun, and a primer gun.
Pricing commonly sits around $140 to $170 on major marketplace listings.
This kit is not the ideal choice for a high-value full repaint where the final clear needs to be as flat as possible. It does make sense as a learning setup. A beginner can practice fan adjustment, overlap, spray distance, trigger timing, and cleaning habits without feeling terrified about damaging an expensive tool.
The 1.8 mm setup is useful for primer surfacer. The 1.4 mm gun can cover many basecoat and clear jobs. The 1.0 mm gun can help with jambs, mirror caps, small trim pieces, and spot repair.
The caution is consistency. Budget kits can vary. Test the pattern every time, and clean the guns carefully after use.
Harbor Freight Black Widow: A Budget Step-Up With More Serious Intent
The Black Widow by Spectrum line sits between bargain-bin spray guns and premium refinish tools. Depending on nozzle size and promotion, pricing often lands around $130 to $180.
This gun can make sense for hobby painters who want something better than a throwaway tool but are not ready to spend several hundred dollars. A 1.7 mm version leans toward primer or thicker material. A 1.3 mm or 1.4 mm version, when available, makes more sense as a finish gun.
The buyer should keep expectations realistic. This is a budget-friendly gun, not a premium refinish tool. It can be a good garage choice, especially when the painter is still learning. A person chasing a show-car clear finish may eventually outgrow it.
3M Performance Spray Gun 2: The DIY Upgrade When Cleanup Matters
The 3M Performance Spray Gun 2 costs more than typical DIY spray guns, but it solves real garage problems. It uses replaceable atomizing heads, so changing tip sizes and cleaning can be much faster than deep-cleaning a traditional metal gun.
The gun works with atomizing heads from 0.9 mm to 2.0 mm, which gives one gun body a wide working range. Current pricing often sits around $535 to $550 for the gun body with an air control valve, before adding heads and cup supplies.
This is the upgrade pick when someone plans to paint more than once. It is especially useful when the same person switches between primer, sealer, basecoat, and clear and wants cleaner changeovers.
The ongoing cost is the tradeoff. Atomizing heads and cup supplies add expense. A serious home painter may accept that cost if it saves cleanup time and lowers the chance of old material hiding inside the gun.
ANEST IWATA LPH400: A Serious Finish Gun for the Garage Painter Who Is Ready
The ANEST IWATA LPH400 is a respected finish gun with a smooth, controlled feel. Many painters like it for clear coat, single-stage paint, and careful basecoat work. It also has a reputation for lower-pressure spraying behavior, which can help outside a large production booth.
Current pricing varies widely by seller, nozzle, cup, and condition. New or lightly used listings often fall roughly between $450 and $680.
This is not the first gun a nervous beginner needs. It is a better fit for someone who has already sprayed panels, understands pressure and overlap, and wants a finish gun that can stay in the cabinet for years.
A practical garage setup would be simple: use a cheaper primer gun, then keep the LPH400 clean for basecoat and clear. That gives the home painter a more serious setup without buying three premium guns.
The DIY Recommendation We Would Actually Give
A first-time painter should not spend the whole budget on one famous gun. Buy a decent primer gun, a better finish gun, clean air filtration, and enough safety gear.
A beginner setup could look like this:
| DIY role | Sensible choice | Approx. cost |
| Primer gun | Budget HVLP with 1.7 mm or 1.8 mm tip | $50–$150 |
| Finish gun | Eastwood LT100, StartingLine, Black Widow, or similar | $90–$250 |
| Serious finish upgrade | IWATA LPH400 or 3M Performance Spray Gun 2 | $450–$550+ |
| Small parts | Touch-up gun with smaller tip | $40–$150 |
| Air control and filtering | Regulator, water separator, clean hose | $75–$250+ |
The sweet spot for many DIY painters is a two-gun setup under $300, not counting air filtration and safety gear. A serious hobbyist can spend more on the finish gun after learning the basics.
HVLP Spray Guns for Professional Auto Body Shops
A professional auto body shop should buy spray guns around repeatability, speed, painter comfort, and parts support. The gun is not just a purchase. It becomes part of the shop’s rhythm.
A shop-level gun should lay base evenly, clear smoothly, clean fast, and behave the same way again tomorrow. It should also have service parts nearby. A damaged nozzle or worn seal should not put the shop in a bind.
A shop should also avoid the one-gun-does-everything mindset. Primer, basecoat, clear, jambs, and small parts all ask for different behavior. Dedicated guns protect the finish and reduce contamination risk.
SATAjet X 5500 HVLP: Premium Control in a Serious Refinish Booth
The SATAjet X 5500 HVLP belongs in the premium shop category. It suits painters who want strong pattern control, modern nozzle choices, and a tool built for daily refinishing.
This gun is often seen in professional refinish work because it gives the painter room to tune the spray feel. The nozzle choices allow different fan shapes and spraying styles. Some painters want a longer, flatter pattern. Others want a softer, rounder feel.
Current pricing often sits around $950 to $1,100+, depending on digital gauge, nozzle setup, cup package, and seller.
This is not a gun to buy only because the name carries weight. It makes sense when the shop has strong air supply, trained painters, and enough refinish volume to justify the cost.
Its strength is repeatability. A painter who knows the gun can use it for controlled basecoat and clear work with less guessing. The downside is price. Nozzle sets and accessories can also cost plenty, so the shop should budget beyond the gun body.
DeVilbiss DV1 HVLP: A Refined Gun for Painters Who Care About Control
The DeVilbiss DV1 is a serious shop gun, especially when bought in the right version for basecoat or clear. It has become familiar in refinish work because it gives painters a controlled, refined spray feel.
Current pricing depends heavily on setup. DV1 HVLP versions often fall around $800 to $950+, depending on whether the package includes tips, gauge, cup, or brand-specific accessories.
The DV1 makes sense for shops that care about basecoat layout, metallic control, and clear coat consistency. Some kits include several fluid tips, which helps the painter match the gun to different coatings.
This is a strong pick when a shop wants a premium traditional gun without defaulting to SATA. It still needs proper setup and clean air, but in skilled hands it can reduce the little finish problems that add time at the end of a job.
ANEST IWATA LPH400: Smooth, Controlled, and Still Loved in Shops
The ANEST IWATA LPH400 works well in shops that prefer a softer, controlled spray style. It has a strong reputation with clear coat and single-stage paint, and it can also serve painters who do not want an extremely air-hungry gun.
Pricing often lands below the highest SATA and DV1 range, though it still sits well above starter tools. Current prices often fall roughly between $450 and $680, depending on version, cup, condition, and seller.
The LPH400 is a good shop choice when the painter values control over raw speed. It may not feel as fast as some higher-output guns, but many painters like the way it lays material down. Smaller shops may also appreciate that it can be friendlier to moderate air systems.
A shop could keep the LPH400 as a clear gun or single-stage gun while using another dedicated setup for primer and basecoat. That keeps unnecessary wear away from the finish gun.
Sagola 4600 Xtreme: A Serious Refinish Gun With Coating-Specific Setups
The Sagola 4600 Xtreme is a strong option for shops that want a premium refinish gun with different cap and nozzle combinations around specific materials. It has versions aimed at basecoat, clear coat, and other coating needs.
Pricing commonly sits around $700 to $900+ in many markets, though regional pricing varies. Some UK listings place Sagola 4600 models in the £660 to £820 range before any local taxes, shipping, or package differences.
This gun makes sense when a shop wants to tune the spray feel by coating type. A shop spraying a lot of clear may choose a clear-focused setup. A shop focused on color blend work may build around a basecoat setup.
The Sagola is not always the first gun hobby painters mention, but it belongs in a professional buying section. It is a serious alternative to SATA, DeVilbiss, and IWATA.
3M Performance Spray Gun 2: A Shop Pick When Speed and Cleanup Matter
The 3M Performance Spray Gun 2 is built around a different workflow. Instead of treating the gun as one fixed metal fluid path, it uses replaceable atomizing heads and works across a wide range of coatings.
That design can help a shop reduce cleaning time and speed up material changes. The gun body is light, and the replaceable heads can cover sizes from 0.9 mm to 2.0 mm.
Current pricing often sits around $535 to $550 for the gun body with an air control valve, before the ongoing cost of heads and cup supplies.
This gun fits shops that care about cycle time, cleanliness, and quick material changes. It can be useful where multiple technicians share tools, training is ongoing, or the shop already uses PPS-style cup systems.
The tradeoff is consumable cost. A traditional metal gun may feel cheaper over time if the shop cleans well and keeps rebuild parts on hand. The 3M system earns its place when saved cleaning time and reduced contamination risk matter more than the cost of heads.
The Shop Lineup That Makes the Most Sense
A professional shop should not ask one HVLP gun to carry the whole paint room. A small lineup with clear roles works better.
| Shop role | Sensible gun choice | Approx. cost |
| Primer gun | Dedicated 1.7 mm–2.0 mm HVLP gun or 3M setup with larger head | $100–$550 |
| Basecoat gun | DeVilbiss DV1 Base, SATAjet X 5500, Sagola 4600, or LPH400 | $600–$1,100+ |
| Clear coat gun | SATAjet X 5500, DV1 Clear, LPH400, or Sagola clear setup | $600–$1,100+ |
| Multi-material quick-change gun | 3M Performance Spray Gun 2 | $535–$550+ consumables |
| Small parts and jambs | Mini HVLP or touch-up gun | $75–$300 |
Buy one premium basecoat gun and one premium clear gun before spending money on extra specialty tools. That pair affects color control, texture, and rework time more than almost anything else in the spray-gun cabinet.
A lower-cost primer gun is fine if it sprays evenly and cleans well. Primer gets sanded. Clear coat gets judged.
Gravity-Feed Guns Are Usually the Right Choice for Cars
Most modern automotive refinishing uses gravity-feed guns. The cup sits above the gun, and gravity helps feed material into the fluid passage.
This design is practical. It works well with smaller amounts of material, cleans easier than many older setups, and gives good control across panels, bumpers, and spot repairs.
Siphon-feed guns can still paint cars, but they are less common in modern refinishing. They usually need more air to pull material from the lower cup. Pressure-feed setups have their place in production or larger industrial work, but most DIY painters and refinish shops use gravity-feed guns for panel work.
A gravity-feed HVLP gun is the safest recommendation for most readers.
Cheap Guns Are Not Useless, but They Need the Right Job
A low-cost gun can teach a painter a lot. It can also spray primer, small parts, and practice panels without draining the budget.
The problem starts when a beginner expects a cheap gun to behave like a premium clear gun on a full repaint. Some budget guns spray surprisingly well. Others have rough machining, uneven air caps, weak seals, or no real parts support.
A cheap gun is less risky on primer because primer gets sanded. It is riskier on final clear because every weakness becomes visible.
A fair rule is simple: save money on the primer gun if needed, but buy the nicest finish gun your air supply and budget can support.
Premium Guns Are Worth It Only When the Rest of the Setup Is Ready
A premium gun can help a skilled painter. It can give smoother atomization, better pattern control, and a more predictable feel. It can also save time in a shop by reducing texture and correction work.
It cannot save bad prep. It cannot overcome dirty air. It cannot fix the wrong reducer. It cannot make a tiny compressor behave like a booth air system.
Premium guns are worth the money when the painter can use the control they offer. A shop painter may feel the difference immediately. A beginner may only feel nervous holding a $1,000 tool.
That is why the buying order should be practical: clean air, correct tips, practice, then premium tools.
Setup Habits Matter More Than Brand Loyalty
Painters love brand loyalty, but setup habits create the finish.
Set pressure with the trigger pulled. Check the pattern before spraying the panel. Strain the paint. Keep the gun distance steady. Watch the wet edge. Clean the gun before material hardens. Keep primer tools away from finish tools.
The gun should feel predictable. When you open the fluid knob, the change should make sense. When you adjust fan width, the pattern should respond cleanly. When you come back the next day and use the same setup, it should feel familiar.
That confidence matters. A painter who trusts the gun can focus on the panel instead of fighting the tool.
Safety Has to Be Part of the Spray Gun Decision
Automotive paint can be dangerous, especially 2K primers and clears that may contain isocyanates. A dust mask is not enough.
Painters need proper respiratory protection, gloves, eye protection, coveralls, and ventilation suited to the coating being sprayed. Home garages add extra risk because fumes can linger, overspray can travel, and ignition sources may be nearby.
The spray gun may reduce overspray compared with older high-pressure methods, but it does not make paint safe to breathe. Read the safety data sheet. Follow the coating maker’s instructions. Protect your lungs before chasing gloss.
Can one HVLP gun paint a whole car?
Yes, one HVLP gun can paint a whole car if it has the right tip, enough air supply, and a painter who knows how to set it up. Still, one gun is not the smartest setup.
A full repaint usually goes better with a primer gun and a separate finish gun. Primer and clear should not share the same dirty fluid path if you can avoid it.
What tip size should I use for basecoat and clear?
Many basecoats use 1.3 mm or 1.4 mm. Many clears use 1.2 mm to 1.4 mm. The product sheet should decide the final size.
Do not choose only by internet advice. Coatings vary. Gun designs vary. The panel test will tell you more than a comment thread.
How much compressor do I need?
Check the gun’s CFM rating, then compare it with the compressor’s delivered CFM at working pressure. A full car repaint needs stable air, not just a large tank.
Small compressors can handle small parts with pauses. Large panels need steady output.
Is HVLP better than LVLP?
HVLP is a strong choice when the compressor can feed it. LVLP may be easier with smaller compressors because it uses less air.
A home painter with limited air should not ignore LVLP. A shop with strong air supply can choose based on finish, speed, and painter preference.
Should a beginner buy a premium gun?
Usually, no. A beginner should buy a sensible finish gun, a separate primer gun, clean air equipment, and practice material.
A premium gun makes more sense after the painter understands distance, overlap, pressure, flash time, and material behavior.
Which gun would I choose if I were painting at home?
A practical home setup would be a budget primer gun with a 1.8 mm tip and a better finish gun with a 1.3 mm or 1.4 mm tip. If the compressor is modest, the Eastwood Concours LT100 is a sensible low-air choice. If the budget is larger and the painter plans to keep painting, the IWATA LPH400 or 3M Performance Spray Gun 2 makes more sense.
Which gun would I choose in a professional shop?
A shop should choose a dedicated basecoat gun and a dedicated clear gun from the premium group: SATAjet X 5500, DeVilbiss DV1, Sagola 4600, ANEST IWATA LPH400, or 3M Performance Spray Gun 2.
The final choice should come from the painter’s hand, the paint system, and local parts support.
The Right HVLP Spray Gun Should Make the Job Feel Calmer
A good HVLP spray gun does not make car painting effortless. It makes the work more predictable.
That is what you are really buying. A steadier fan. Cleaner atomization. Less guessing. Better control when the clear starts to lay down and the panel begins to shine under the light.
A DIY painter should start with a practical two-gun setup and spend real time practicing. A serious home painter can upgrade the finish gun once the basics feel natural. A body shop should invest in dedicated guns that protect repeatability and reduce rework.
The right choice is not the loudest brand name or the highest price. It is the gun that fits the air supply, matches the coating, feels natural in the hand, and helps the painter trust the next pass.